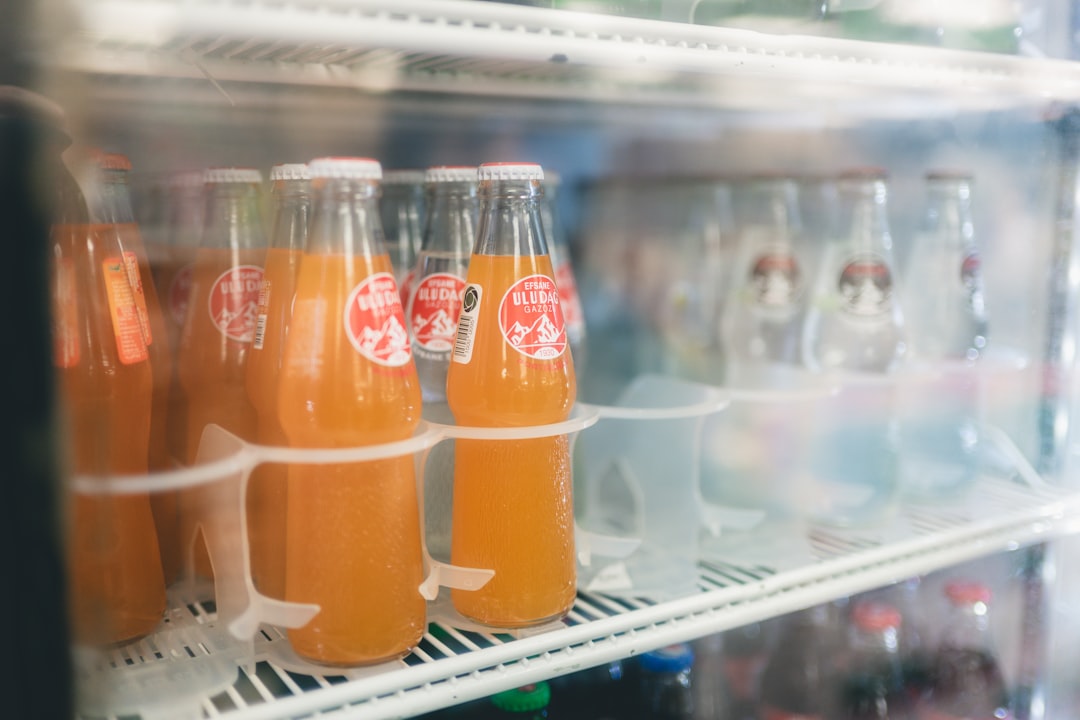
The Architecture of an Organized Refrigerator
For most homeowners, the refrigerator is the most chaotic zone in the kitchen. We purchase groceries with the best intentions, only to find items buried behind milk cartons and forgotten produce drawers. Implementing DIY refrigerator shelf dividers is not merely an aesthetic choice; it is a critical strategy for food management, hygiene, and energy efficiency. By creating defined zones, you reduce the time the refrigerator door stays open, allowing the internal compressor to maintain a consistent temperature with less strain.
When you move beyond generic store-bought bins and embrace custom modding, you gain the ability to tailor your storage to your specific dietary habits. Whether you need narrow slots for juice boxes or wide bays for meal-prep containers, the right hardware and structural approach make all the difference.
Understanding Material Selection for Fridge Modding
When working with DIY custom shelf dividers for efficient storage, your primary constraint is the cold, humid environment of the refrigerator. You cannot use standard wood or porous materials, as these become breeding grounds for bacteria and mold.
The Best Materials for Your Project:
- Acrylic Sheets: The gold standard for DIY dividers. It is transparent, shatter-resistant, easy to clean, and provides a sleek, modern aesthetic.
- Corrugated Plastic: Lightweight and incredibly easy to cut with a craft knife. Perfect for temporary organizational setups.
- Tension Rods (Miniature): Often found in the hardware aisle for small window treatments, these work perfectly as adjustable dividers when fitted between two shelving surfaces.
- PVC U-Channels: These can be glued to the underside of the shelf above or resting on the shelf itself to act as a track system for slide-in dividers.
Comparison: DIY Approaches vs. Commercial Solutions
| Feature | DIY Custom Dividers | Commercial Plastic Bins | Custom Magnetic Systems |
|---|---|---|---|
| Cost Efficiency | High | Low | Moderate |
| Customizability | Unlimited | Limited to fixed sizes | Medium |
| Durability | High (if materials chosen well) | Moderate | High |
| Installation | Friction/Adhesive | Drop-in | Magnetic/Suction |
| Ease of Cleaning | High (Removable) | Low (Dust traps) | Medium |
Step-by-Step: Creating Acrylic Tension Dividers
The most professional-looking DIY refrigerator shelf dividers involve using acrylic sheets and clear, food-safe adhesive mounting points.
Tools and Materials Required:
- Clear acrylic sheets (1/8 inch thickness).
- A high-quality plexiglass cutter or a rotary tool with a cutting wheel.
- Heavy-duty, food-safe, double-sided mounting tape or clear silicone sealant.
- A precision measuring tape and a square ruler.
The Construction Process:
- Map the Interior: Measure the depth and height of your shelf clearance. Leave a 1/2-inch buffer to ensure items don't catch when pulling them out.
- Cut to Size: Score the acrylic with your cutter and snap it against a hard edge. Sand the edges with fine-grit sandpaper to remove any burrs that could scratch the fridge’s plastic walls.
- Mounting Logic: If you have glass shelves, you can use U-shaped clips made of clear plastic. These slide over the edge of the glass, creating a permanent yet removable track for your dividers.
- Testing: Before applying any adhesive, conduct a "dry fit." The divider should stand perfectly vertical without wobbling.
Advanced Modding & Maintenance Gear: Keeping It Sanitary
Integrating Hardware into your fridge environment requires a "food-first" mentality. Any gear you introduce must be capable of surviving weekly wipe-downs with mild soap and water. Avoid using galvanized hardware or unfinished metals, as they may rust in the high-humidity environment of a refrigerator.
When choosing adhesives, ensure they are labeled for "low temperature" performance. Many common super glues become brittle and snap when exposed to the 35°F–40°F environment of a standard fridge. Look for silicone-based adhesives, which maintain flexibility even in extreme cold.
Optimizing for Efficiency: Zones and Flow
The true power of DIY refrigerator shelf dividers lies in the "zone" strategy. Use your new dividers to create specific departments:
- The "Eat Me First" Zone: Use a dedicated divider to section off an area near the front of the shelf for expiring items.
- The Beverage Bay: Use tension rods or acrylic sheets to create narrow, vertical channels that prevent bottles from rolling around or tipping over.
- The Snack Station: Create a designated, slim aisle for individual snack packs, keeping them upright and easily visible for family members.
Troubleshooting Common Installation Issues
Even the most seasoned DIYer will encounter issues. If your divider is slipping, it is likely due to the "frost factor." Condensation can compromise adhesive bonds. Always ensure the refrigerator surface is 100% dry and cleaned with isopropyl alcohol before applying any mounting hardware.
If you find that your dividers are too heavy, consider switching to lighter materials like thin, corrugated polycarbonate. If you are struggling with shelves that are not perfectly square (a common issue in modern appliances), use adjustable tension rods rather than rigid acrylic, as the rods can accommodate minor deviations in shelf width.